
In this article, I am going to show you How to Install macOS 10.14 Mojave on VirtualBox on Windows? First, you have to know about macOS 10.14 Mojave? macOS 10.14 Mojave is the latest operating system for Mac computers which the name is taken from desert instate of the mountain this time. During the Worldwide Developers Conference (WWDC) 2018, Apple announced that they are working even more on their services. Which covers macOS, TVOS, watchOS, iOS and Finally macOS.
After macOS High Sierra, Apple made many effective and required features inside the macOS 10.14 Mojave. The major updates are Dark Mode, a dynamic background which changes according to the hour of the day, Voice memos, Group FaceTime, New App Store, News, Stocks and etc.
Windows users, if your PC has at least 6GB RAM, 64-Bit Running Windows, then you are able to use the macOS 10.14 Mojave on your PC, your PC must have an SSD too, here I am testing mac operating systems on HDD. That’s Why I am recommending an SSD.
Required Files to Install macOS 10.14 Mojave on VirtualBox on Windows:


Install macOS 10.14 Mojave on VirtualBox on Windows
Step Guide to Install macOS 10.14 Mojave on VirtualBox on Windows 10
Step #1. Download and Install VirtualBox
VirtualBox is an open source virtualization software for Windows, Mac, Linux. If you want to install macOS 10.12 Mojave on Virtual on Windows, you have to download & Install the latest version of VirtualBox.
if you are using Virtualbox 4.x or older version again it can work
Step #2. Extract macOS Mojave 10.12 Virtual Image
macOS 10.14 Mojave is compressed and zipped for storing less storage and security. While creating macOS 10.12 Virtual Image, most of the time we compress them because of its size. The actual size of macOS 10.14 Mojave is 10 GB & when we compressed it. Then it becomes 6 GB.
In order to unzip the macOS 10.14 Mojave, you need to unzip it by WinRAR.

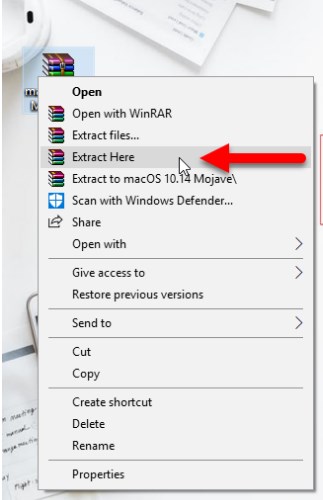
Extract macOS Mojave 10.12 Virtual Image
Step #3. Create a New Virtual machine for macOS 10.12 Mojave
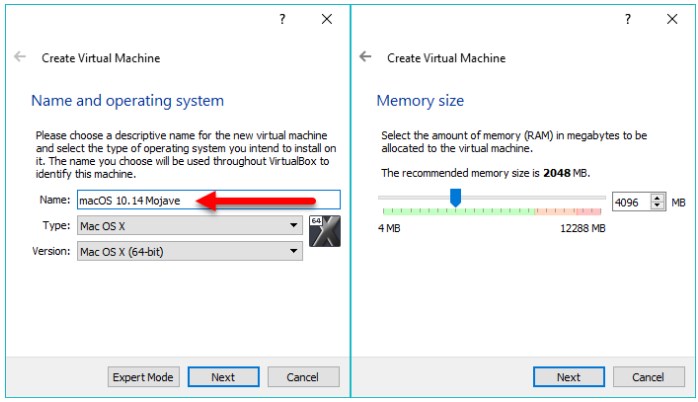
When you installed VirtualBox on your system, then launch the program, after that click on “New” at the top window. This will open the Virtual Machine Wizard.
- First, type a name for the Virtual Machine.
- After typing the name for Virtual Machine, you need to copy it.
- For Memory size, increase its memory up to 4096 MB which will be 4 GB RAM.
Note: While typing a name for the virtual machine in VirtualBox, it will detect the version and architecture. But If you type unfair name like test 1, it won’t detect the version and architecture, that select them manually.

Create a New Virtual machine for macOS 10.12 Mojave
Step #4. Add the macOS 10.14 Mojave Virtual Image to Virtual Machine
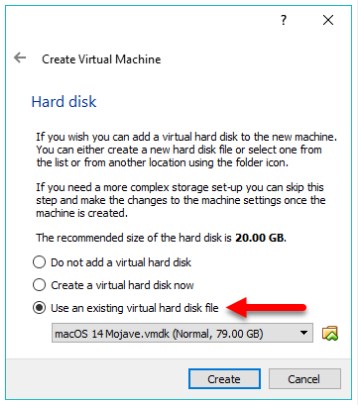
When you specified the amount of RAM, you will be directed to the Hard Disk Panel. Here you have to locate the macOS 10.14 Mojave and to do that,
- First, Select Use an existing Virtual Hard Disk File.
- Second, click on the yellow folder and locate the macOS 10.14 Mojave.
- Third, Once you did that click create.

Add the macOS 10.14 Mojave Virtual Image to Virtual Machine
Step #5. Customize Virtual Machine’s Preferences
Here, if you want to work perfectly with macOS 10.14 Mojave on VirtualBox, then you need to customize some settings. This Customize work for better performance is
- Boot Order
- Amount of Processors
- Video memory
- and Storage cache
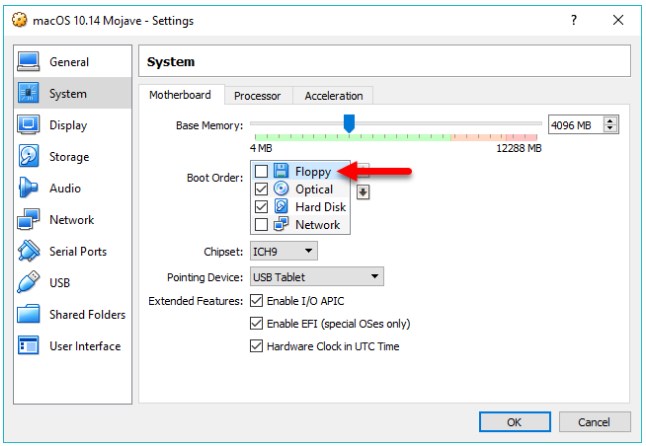
For editing them, select the created Virtual machine and select the settings. then, open system panel and uncheck floppy from boot order.

Customize Virtual Machine’s Preferences
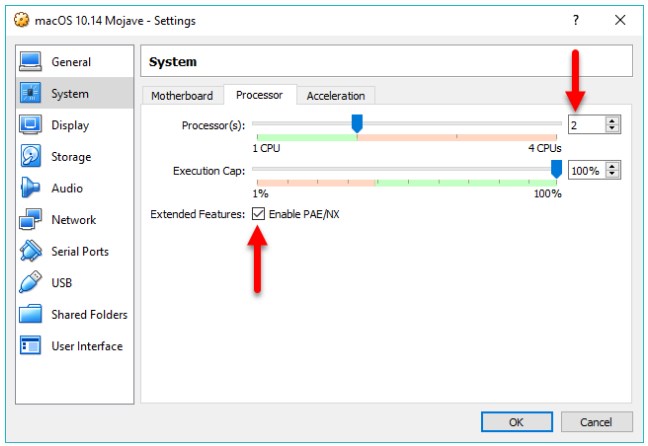
Here, move to the Process tab then increase the amount of processor from 1 to 2 processor and also enable the Enable PAE/NX feature.

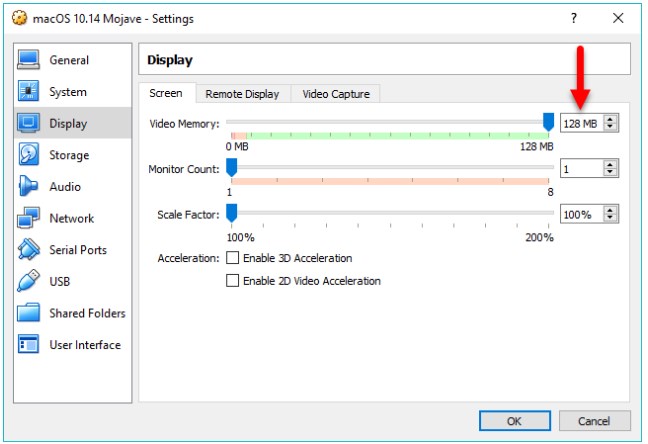
After that go to the Display Panel then increase the video memory from 1 to 128 MB, if you desire you can also enable the 3D accelerations.

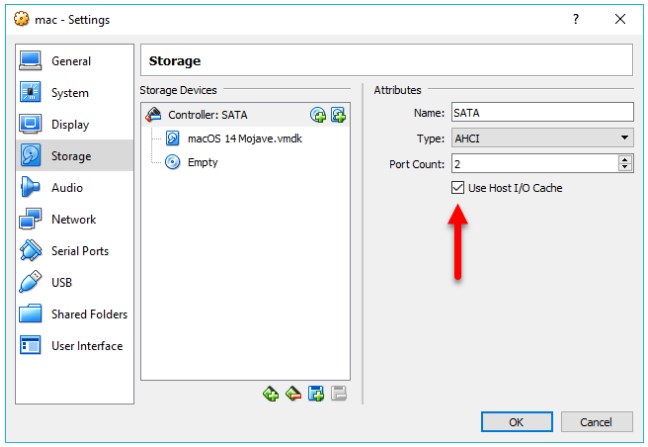
Now you have to enable the caching feature. Go to the storage tab, click on it or on the attributes panel enable Use Host I/O cache.

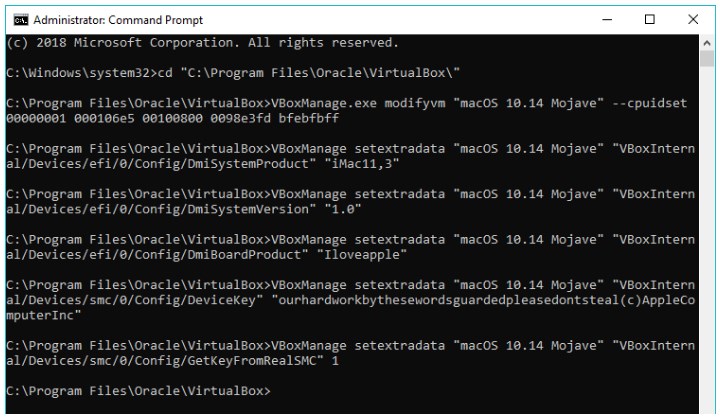
Step #6. Now Enable Apple Services for macOS 10.14 Mojave with Command Prompt and Codes
VirtualBox has the ability to support the Apple operating system. But when you are testing Mac OS, it fails to start the process of installing and using Mac Operating Systems. Here you need to use the codes.
Code For Virtual Box 5.x
cd "C:\Program Files\Oracle\VirtualBox\"
VBoxManage.exe modifyvm "Virtual Machine Name" --cpuidset 00000001 000106e5 00100800 0098e3fd bfebfbff
VBoxManage setextradata "Virtual Machine Name" "VBoxInternal/Devices/efi/0/Config/DmiSystemProduct" "iMac11,3"
VBoxManage setextradata "Virtual Machine Name" "VBoxInternal/Devices/efi/0/Config/DmiSystemVersion" "1.0"
VBoxManage setextradata "Virtual Machine Name" "VBoxInternal/Devices/efi/0/Config/DmiBoardProduct" "Iloveapple"
VBoxManage setextradata "Virtual Machine Name" "VBoxInternal/Devices/smc/0/Config/DeviceKey" "ourhardworkbythesewordsguardedpleasedontsteal(c)AppleComputerInc"
VBoxManage setextradata "Virtual Machine Name" "VBoxInternal/Devices/smc/0/Config/GetKeyFromRealSMC" 1
Code For VirtualBox 4.x
cd "C:\Program Files\Oracle\VirtualBox\"
VBoxManage.exe modifyvm "Virtual Machine Name" --cpuidset 00000001 000306a9 04100800 7fbae3ff bfebfbff
VBoxManage setextradata "Virtual Machine Name" "VBoxInternal/Devices/efi/0/Config/DmiSystemProduct" "MacBookPro11,3"
VBoxManage setextradata "Virtual Machine Name" "VBoxInternal/Devices/efi/0/Config/DmiSystemVersion" "1.0"
VBoxManage setextradata "Virtual Machine Name" "VBoxInternal/Devices/efi/0/Config/DmiBoardProduct" "Iloveapple"
VBoxManage setextradata "Virtual Machine Name" "VBoxInternal/Devices/smc/0/Config/DeviceKey" "ourhardworkbythesewordsguardedpleasedontsteal(c)AppleComputerInc"
VBoxManage setextradata "Virtual Machine Name" "VBoxInternal/Devices/smc/0/Config/GetKeyFromRealSMC" 1
During the creating Virtual Machine, I have told you to copy the Virtual Machine Name that you are creating. Here you need to Replace that name with “Virtual Machine Name”
When you replaced the name with Virtual Machine, follow the below procedures.
- Run Command Prompt as Administrator.
- Then, Copy each line of code one by one and paste that on Command Prompt. When you did press enter.

Enable Apple Services for macOS 10.14 Mojave with Command Prompt and Codes
Step #7. Install macOS 10.14 Mojave on VirtualBox
- First, Open VirtualBox then start the created Virtual Machine.
- Now Wait for some seconds until the codes panel and apple logo go away.
- On the Welcome screen, select your country then select continue.
- You need to Select your Keyboard layout.
- Select, don’t transfer any information type after that click continues.
- Decide to sign in with Apple ID or Not.
- Agree to the terms and conditions.
- Create an Account for the macOS Mojave 10.14.
- Choose a look for your Mac Device, whether it is the light mode or Dark Mode.
- Select Continue on the Express Set up window.
- Wait for Some seconds until your Mac is set up for use.

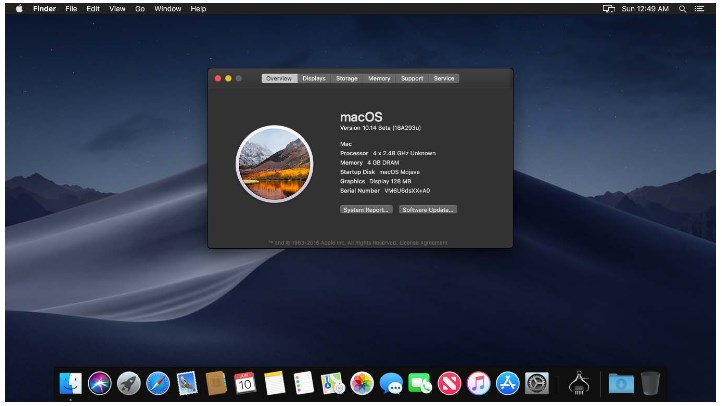
Install macOS 10.14 Mojave on VirtualBox
virtualbox mac os macos Mojave VMware Mojave for virtual box virtualbox install windows techsviewer VirtualBox installation install VirtualBox on Mojave install VirtualBox mac